
Here is the fabric flower that I used on my oldest daughter's dress down below. I also made a bunch and attached them to clips to use as barrettes. Here is how I did it:
 Here is how I did it:
I cut the fabric into squares. I started at 3.5 inches and went down a half of inch from there. ie. 3 inches then 2.5...
 fold your square in half

in half again

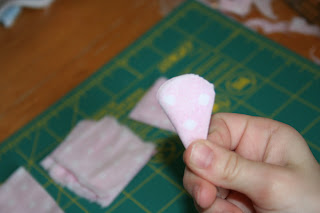
into a triangle-

round off that corner

now you have an ice cream cone shape, mmmm.
 fold your square in half
in half again

into a triangle-

round off that corner

now you have an ice cream cone shape, mmmm.

open up and you have a flower shape!

sew around the edge of the flower.

After I attached it to the dress I realized that the big one flopped down so I had to tack the top petal.

sew around the edge of the flower.
(This part is a pain in the butt)
Then stack them and sew a button all the way securing them together.

After I attached it to the dress I realized that the big one flopped down so I had to tack the top petal.
No comments:
Post a Comment